
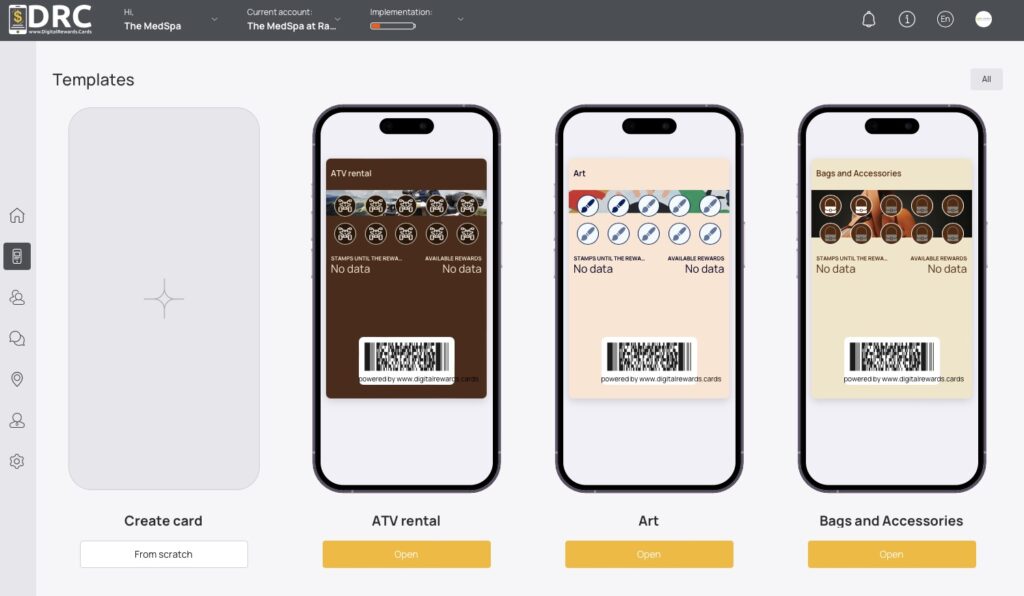
1. Create a new card #
- Register or log in to the service at app.digitalrewards.cards link.
- Click Cards Tab on the left side bar
- Go to create a card based on the specific template.
- Select one of the 70 pre-prepared templates that are appropriate for your business.
- Or select to create a card without using template.
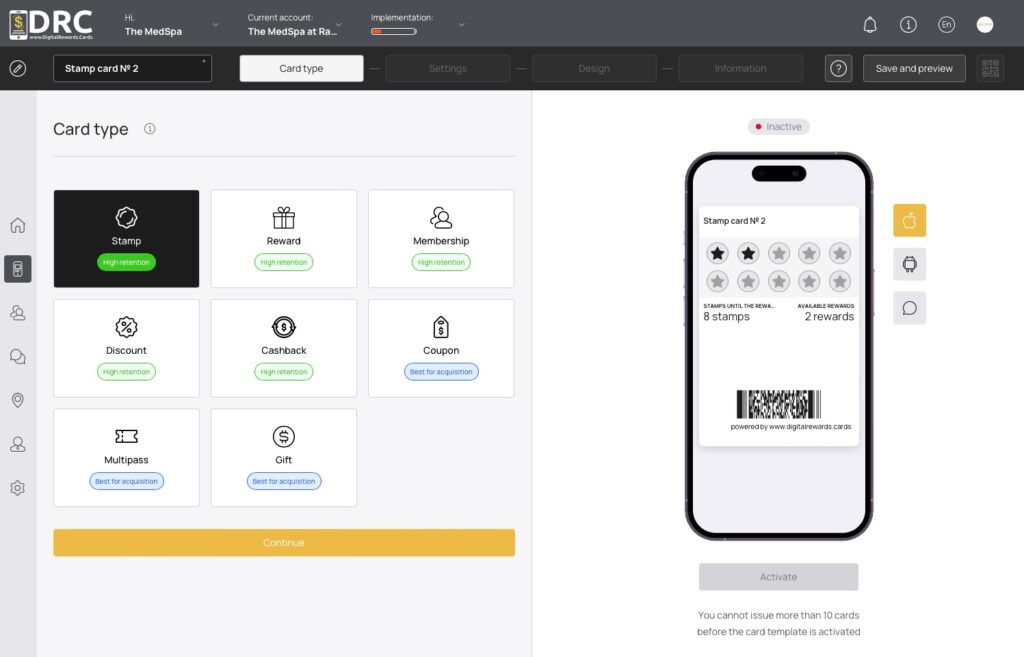
2. Select Card type #
- Stamp card
- Subscription card
- Discount card
- Cashback card
- Coupon card
- Certificate card
- Membership cards
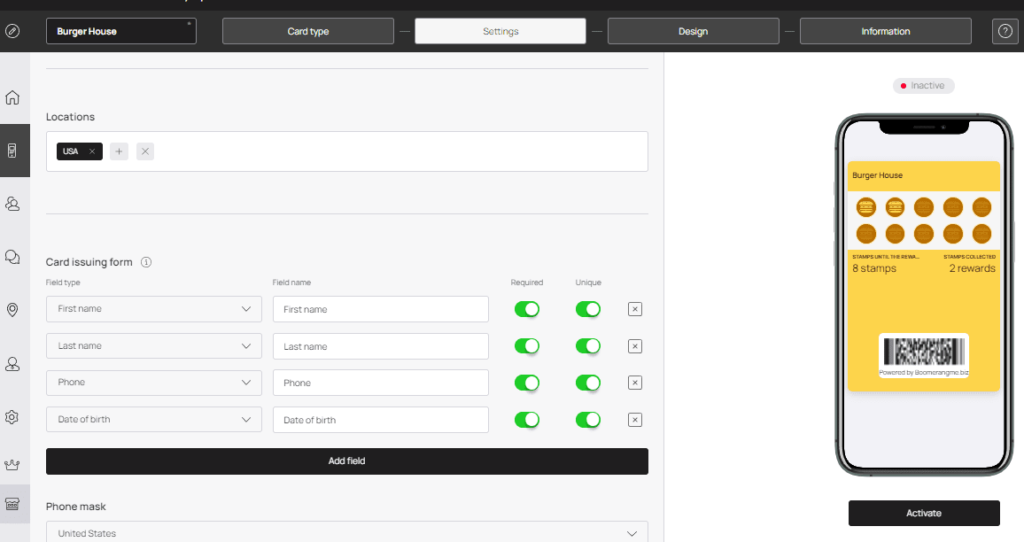
3. Set up the Card Settings #
- Add language
- Card expiration date
- Stamp life
- Add locations
- Add the locations of your outlets.Write text that will appear as PUSH on customer devices within 330 feet of the location.
- You can add up to 10 locations per card.
4. Set up the card issuing form #
- Decide which data fields you would like to be filled by customers when they sign up for your loyalty program.
- These data fields will be appeared automatically on the registration page, and all the information you collect will be saved to your Customers page as soon as they sign up.
- Be sure to select a format (e.g. text, email, phone number, date) and specify whether the information is required or optional.
5. Add phone mask #
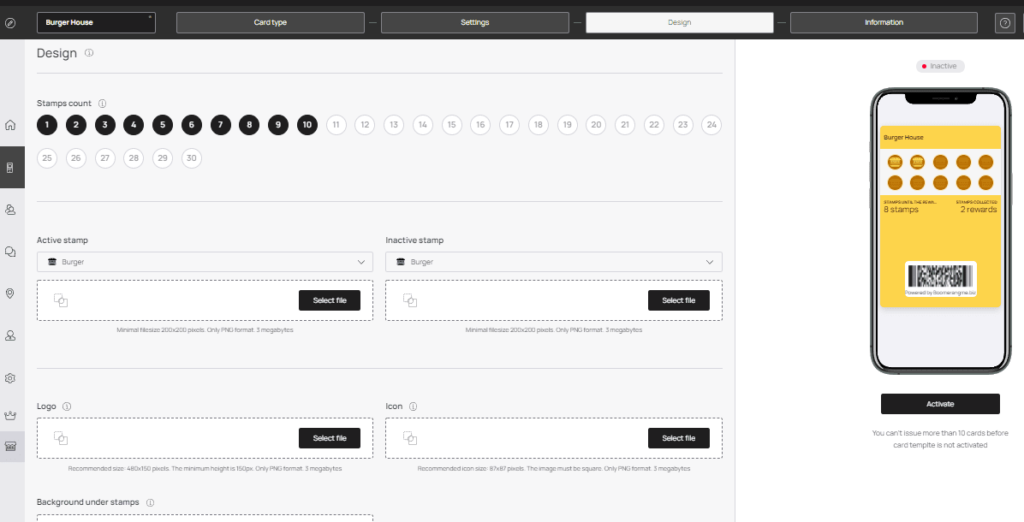
6. Customize the design #
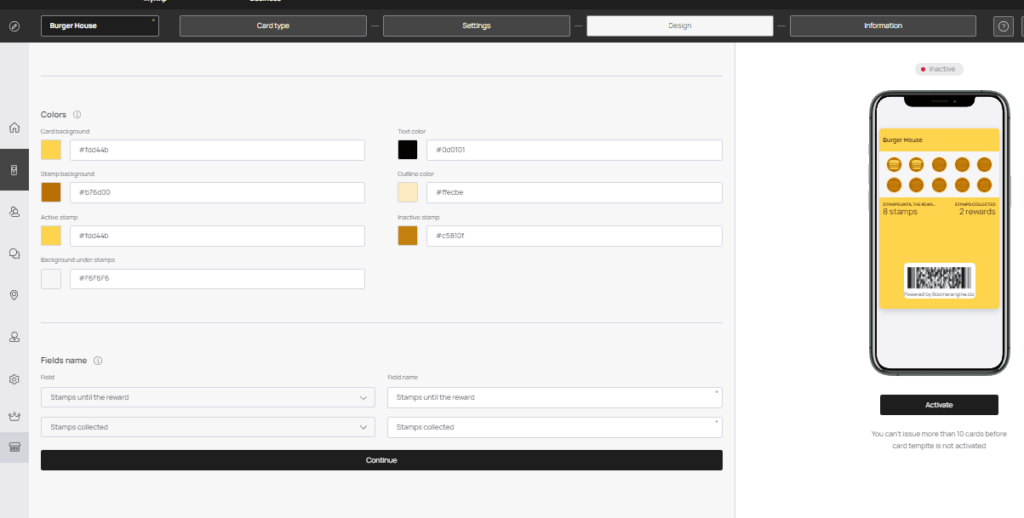
- Enter a name for the card at the upper right corner box
- Select the number of stamps on the card from 1 to 30.
- Select active or inactive stamps to be displayed on your card.
- Select your images: logo, icon, background under stamps.
Notes:
Pay attention to the limitations on file size.
If you do not have necessary pictures - do not worry.
The standard images of the system will be displayed on the card.- Adjust the colors of the card itself, the stamps and the text.
- Go to the next step
- Add Data fields on the card’s main page
- You can change or remove the data fields from the home page below the stamp strip.
- By default, the left margin below the stamp bar shows the number of stamps before you receive a reward.
- The total number of stamps used in the card for the whole period since it was issued (for example, a phone number or name) might be displayed in the right data field.
7. Add information #
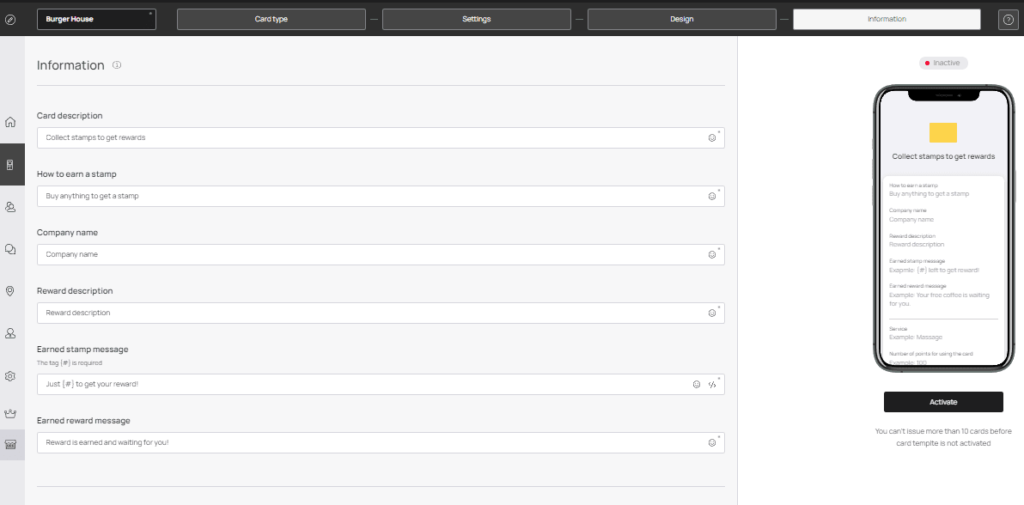
- Enter your loyalty card information by filling in all the data fields.
- If you want your loyalty cards to expire, select the appropriate option and select the date or the period after the registration.
- Use the short code {#} in the PUSH message about stamp accrual. It will automatically substitute the number of stamps remaining until you receive the award.
- Place useful links such as: your website, instagram, address, and phone number.
- Fill in the legal information
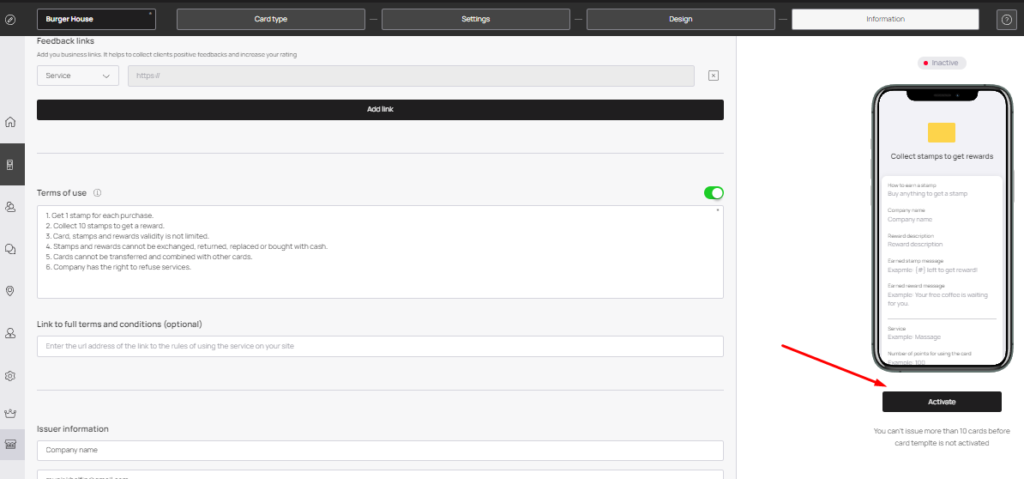
- The terms of the use are pre-filled with text so that you can simply correct it.
- Simply enter the text you want to change.
Or delete all the text and enter the terms and conditions that your customers need to see.
- To enable conditions to be displayed on your customer card, activate “Display on Card.”
- Finally, enter your company information, so that your customers know who to contact if they have questions.
8. Card preview and activation #
- Click save and preview button to view your card on your device.
- Click Activate button under the preview of the phone
Notes:
After activation, you can’t edit some card settings:
- Card type
- Loyalty program terms
- Card expiration date
- Issuing form details
9. Distribute the card to customers #
- After activation, you are given a unique link (your card URL).
- Upload your client base to the service by system template (available in your personal account in the cards distribution page).
- Send the card to your clients via SMS and Email right from your personal account.
- Print out a QR-code for the card issuing and place at your sales outlets for offline distribution of the card.
10. Card installation #
- After activation, you are given a unique link (your card URL).
- The service will offer to scan the QR code or copy a link.
- After scanning you will see the card issuing form, which we set up in step 6.
- Fill in the data fields and click request a card button.
- When the card appears on the screen, click Add button in the top right upper corner of the screen.
- That’s it! The card is now available in the Wallet app on your iPhone or in the Google Pay or WalletPasses on Android.